
5 Extremely Lazy Ways to Get Great Photographs Every Time
I have to admit, sometimes I am feeling lazy, tired or just not really that motivated to go out on that huge hike to that amazing location. Other times, I might be out but am not sure exactly what settings would be best, or i just want to get great photographs with minimal effort so I can get back to the warmth of my house. When this is the case, these things do come in really handy.
Landscape Photography doesn’t always have to be a super strenuous activity, in fact some of the best places you can get photographs are from certain car parks or a short walk away from them. In fact some of the photographs in this article have been taken with minimal effort for maximum effect.
1 Bracket Your Photos and Pick the Best One Later

This is a 5 image sequence, but you can get the Sony cameras to take 9 images like this and then pick the best one later.
The primary idea behind bracketing your photographs is to be able to increase the dynamic range of your camera, so if you are photographing a bright sunrise with a dark foreground, you can get detail in both parts of the image and then combine them afterwards.
However, another use of bracketing is to take a photograph of a scene and then pick the best one afterwards. This is a very lazy way to photograph a scene but can be highly effective.
Imagine you took one photograph of a big landscape with an epic sunset unfolding within. If you took one or two photographs of this scene, you might get it if you are on your game, but you might also miss the perfect settings.
So you then take your photographs back to your computer and get disheartened because you blew out the highlights or lost details in the shadows … or maybe parts of the photograph have just come out a bit noisy because of incorrect exposures.
In Bracketing your photographs, you are capturing a series of images with different exposures, so if one was out, you can then pick the next, and then the next one, until you find the photograph that works the best.
This can be very effective and can get you the settings you wanted for that scene. Then all you do is disregard all of the other photographs you took as they cost nothing more than a few extra seconds to take.
If you want to learn all about what bracketing is actually good for, then click here for another of my articles.
2 Look What the Pros Have Done and Replicate Them
This is a very lazy way to shoot a scene, but if you are new to a location and you don’t know where to go, you could quite easily look to see what others have shot there and replicate those images.
Then all you do is say that you are paying homage to that photographer that took it first … after all, in being a lazy photographer, you could have the idea that pretty much everything has already been photographed … so why reinvent the wheel?
However, if you do this, it can end up being like a bit of a treadmill, following others who have already taken all of these great photographs … and you might end up relying on this technique to get good photographs instead of flexing your creative powers to get some unique photographs.
So if you are doing this right now … just try to look for some original photographs after you have replicated that scene you saw and liked. This will then get you developing your own skills of finding compositions that you will be proud of.

Google any location with landscape photography and you will find some amazing photos!
3 Click auto in Lightroom and Most of the Editing will be Done for You

This auto button can do all of the work for you!
When it comes to editing, a lot of the time you will make the same edits time and time again. But there is a function in Lightroom that can save you a lot of this time and effort … and that is the auto edit function.
You can find this in the HDR and panorama pop up panels as well as in that basic editing panel on the right hand side of the Develop module in Lightroom … and it can do a great job.
If I am feeling lazy, I will sometimes use this to see what it produces, but most of the time I will end up clicking CMD-Z as it doesn’t quite hit the mark … but every now and then it does a great job to start off the editing process … and then you can tweak the settings it has given you to finish off the edit.
4 If the Sky Isn't Good, Replace it.
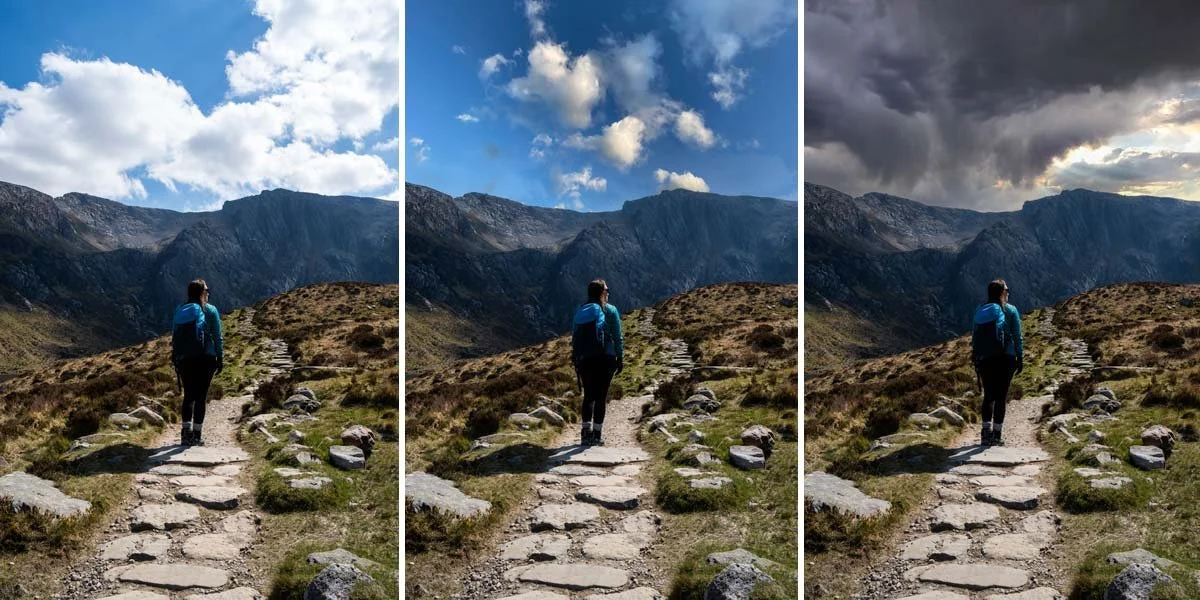
If you really want you can replace the sky in photoshop … just be careful to match up the lighting on the ground with the sky you’re dropping in.
Sky replacement used to be an art of blending two photographs together to make a composite, but nowadays it has become a one click solution … and it can produce some interesting results.
I think Luminar from Skylum used it as one of their selling points and then Adobe ended up adding it to Photoshop, as a lot of hobbyists were changing to Luminar from photoshop and Lightroom … and to be honest, I am surprised the Lightroom development team haven’t added it to their repertoire yet … I’m sure it is probably in the pipeline though.
In photoshop, it is a case of clicking on edit, finding sky replacement in the dropdown menu and then picking an “Epic Sky” for your photograph, turning what might have been a pretty boring sky into an EPIC one.
If you’re not sure of my view on sky replacement, watch this video now … but I think it is a little defeatist when it comes to being a landscape photographer … and downright dishonest if you try to pass a composite off as a single photograph.
This happens a lot more than you might think …
I like making composite images but I will always call them composites over photographs.
5 Find the Locations You Can Drive to (No Hiking needed!)
Some landscape locations take ages to get to with multi hour hikes to get to the perfect spot for that scene … but others are within a few feet of a carpark or a road.
I have taken some of my favourite photographs from these locations and even though I feel a little lazy when taking them, this shouldn’t take anything away from them … I have one of these ones hanging on my wall and I often get friends and family commenting on it when they come to visit … but you can find some amazing locations with a bit of research on line to some great places to shoot either a few meters away from your car, or even from the car seat itself.
Click on this video where I show you how to get great photographs from your car.

My car was about 10ft behind me with this image … but I still love this moonlit scene of Tre Cime in the Dolomites
You can get some great images with minimal effort and minimal time dedicated to your landscape photography, but for me, the hiking and the strenuous effort I put in to getting a photograph is half the fun. It keeps me fit, it gets me out of the house, and ultimately I get some great rewards from my landscape photography and this is what it comes down to.
So just ask yourself … what are you in it for?
Thanks for reading and if you liked this article and want to find out more about landscape photography, try clicking on this one next where I talk about getting great exposures next time you are out with your camera.
Thanks
Mike 😁👍