

Exposure Compensation - Turn Your Camera into an Exposure Genius
If you are new to photography, you might be wondering what is the point in using shutter priority or aperture priority over auto mode, after all, they basically do the same thing where the camera chooses the right exposure for your photograph … but there is a setting that turns those semi automatic modes in to supercharged mega modes!!
Exposure compensation is a setting that lets you override what the camera thinks is right. If your photograph is too dark, you can brighten it up and if it is too bright, you can darken it down, in an instant. Nowadays, most good cameras have a dedicated exposure compensation dial for easy access.
I use exposure compensation for 95% of my photography and when used in conjunction with the semi automatic modes, you can really quickly dial in your settings, so the settings don’t get in the way of you enjoying photography.
Here’s my video that explains Exposure Compensation
What is Exposure Compensation?
Exposure compensation is a way of you telling the camera that you don’t quite agree with the settings it is giving you for a given scene. It gives you the quick option of brightening or darkening your photograph before you take it.
How to access Exposure Compensation
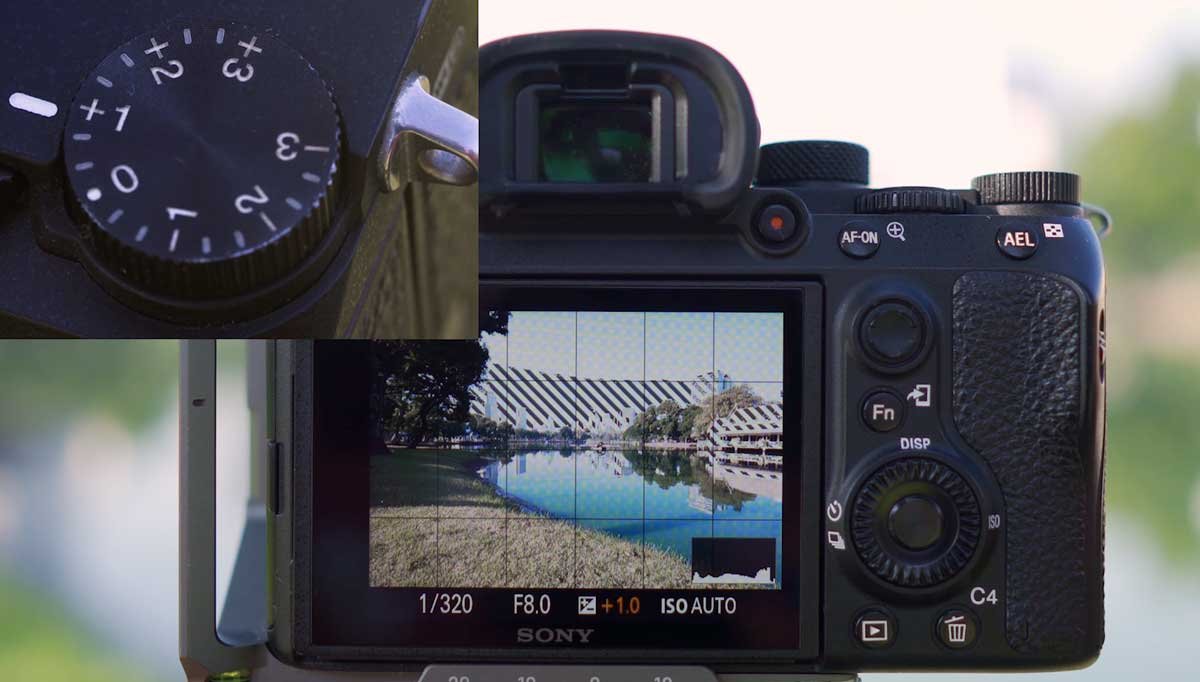
On the Sony cameras as well as the Fuji cameras, it comes in the form of a dial with + and - figures on it. For both of those brands, it sits on the right hand shoulder of the camera body and is easily accessible … although with the A7iv and the A7siii, they have removed the numbers from the dial and made it a fully customisable dial, instead of a one use dial.

Exposure Compensation dial
With the Nikon and Canon cameras as well as Panasonic cameras, it is a function within the +/- button. I don’t really understand this as it is an integral part of photography and really needs to be readily accessible to speed up the process.
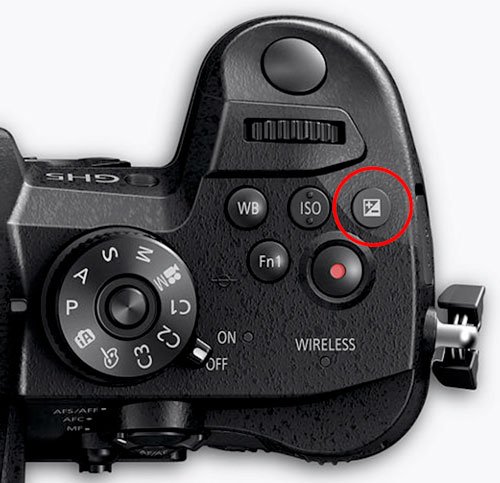
Exposure Compensation Button
When to use Exposure Compensation
Exposure compensation needs one or more of the principle settings to be controlled by the camera to work, these are aperture, shutter speed and ISO.
This is because when you turn the exposure compensation dial, it changes one of these three settings to alter the exposure of the camera.
Why it doesn't work in Manual mode
If all three of your principle settings are controlled by you, that's iso, aperture and shutter speed. Your camera doesn't have any setting that it is in control of, this is why turning your exposure compensation dial won't do anything when you are in manual mode with manual ISO.
Like I said earlier, your camera needs one of the three principle settings to be controlled by the camera, so when you turn your exposure compensation dial, it changes that setting.
Why exposure compensation is so good
Exposure compensation is much better in conjunction with aperture priority than, let's say, manual mode, because the automated system within the camera gets you most of the way there with your exposure, then you just tweak the settings with the exposure compensation dial to get the photograph to where you want it to be.
So you let the camera do all the hard work with big changes, and then you tweak the settings with your exposure compensation dial
An example of how I use exposure compensation
If I am shooting a scene and the settings are good as they are. I might turn around and see an even better scene in a different direction.
In turning the camera around, it automatically changes the settings to what it thinks will be a good exposure, but let’s say there is a lot of dark parts to the frame like in the cave photograph below; the camera will brighten up the shot to try and balance out the exposure. In this case, getting the exposure back down by pushing the exposure compensation dial into the - figures will help get control of the exposure.

Dark cave with overexposed highlights

Exposure compensation set to -1.6 to protect the highlights
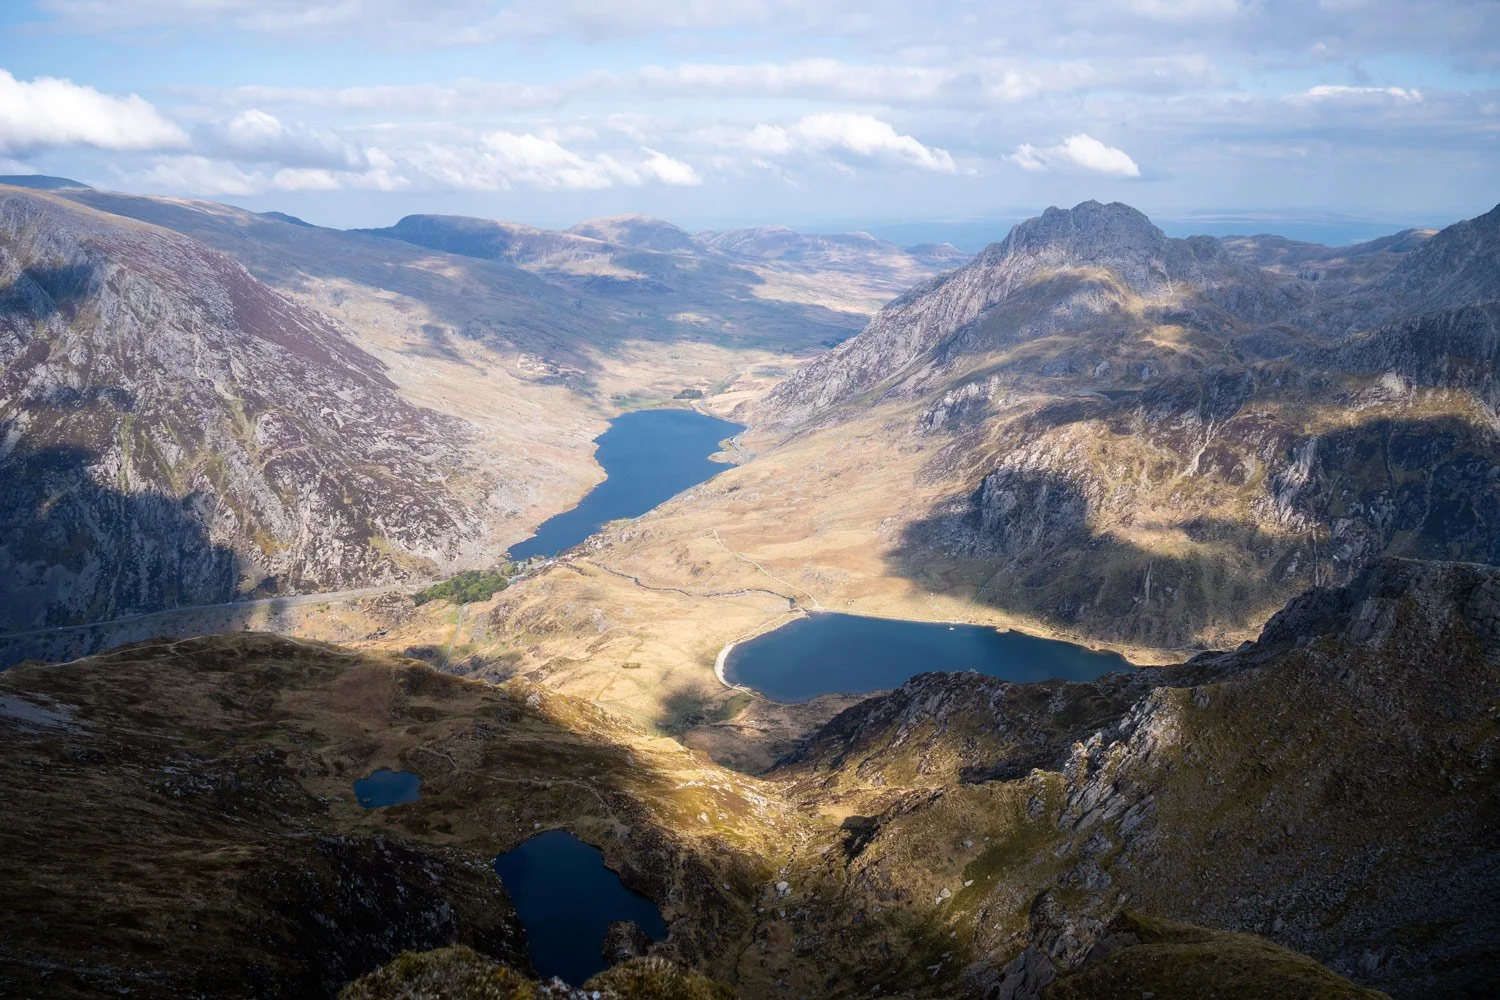
On the other hand if you turn the camera around and there is a lot of bright sky in the frame, it will darken down your image to try to balance out the exposure, but you might not want this. In this scenario, you would have to push the exposure compensation into the + figures to brighten up the exposure back to where you want it to be.
Auto ISO can also be Adjusted with Exposure Compensation
One way you can use your exposure compensation dial in manual mode is if you set your ISO to auto. This then gives the camera control over ISO. When you change your exposure compensation, the camera will change your ISO to make those changes you want.

Minus figures with exposure compensation will darken your image with Auto ISO
Plus Figures with exposure compensation will brighten up your photograph with auto ISO
Conclusion
In using the exposure compensation dial in conjunction with the Aperture Priority mode (A, Av), this gives you so much control over your settings and your camera, whilst benefiting from the automatic adjustments modern cameras offer you. So you can go out and enjoy your photography instead of getting frustrated with the settings not being right for what you are photographing.
If you liked this article and want to learn more about how to choose the right aperture setting for the landscape you have in front of you, try this post next by clicking here or on the image below. In it I show you the different apertures you can use to get the best out of your camera.
Click here to find out the best ways to utilise your aperture settings for landscape photography